How to add stamps with notes into PDF file with FlexiPDF
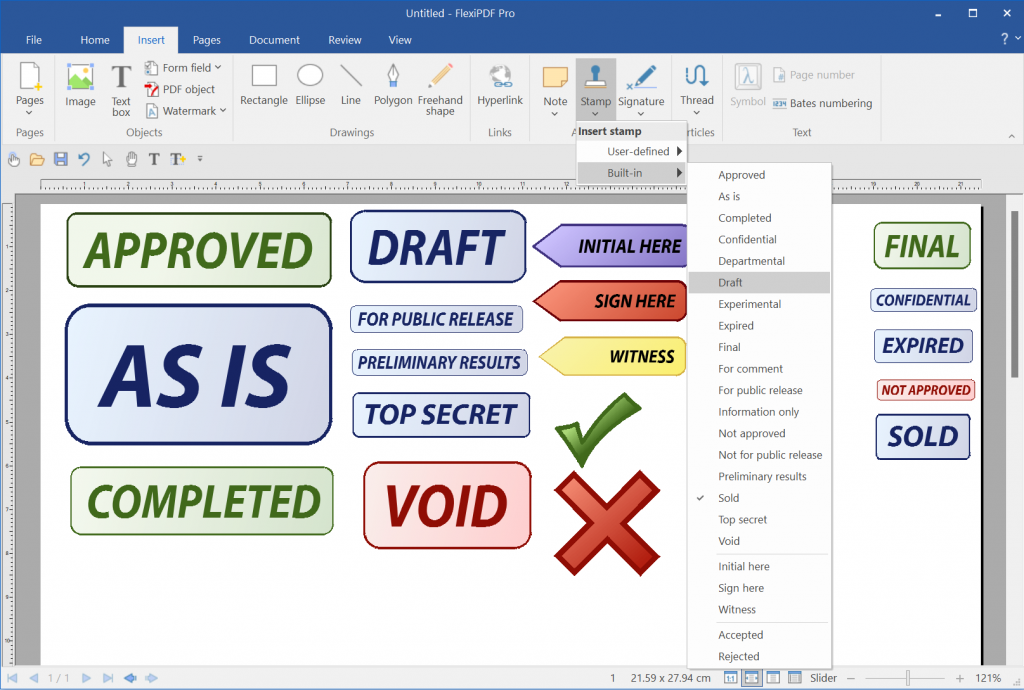
Stamping an Adobe PDF involves inserting an image into certain pages when PDF document is created or to an existing PDF document. FlexiPDF allows to use one of 23 pre-defined Built-in stamps or User-defined one. Stamp also includes written note, title, author and date&time of stamping to provide effective digital document workflow.
FlexiPDF Professional can easily add stamp for your PDF with these steps:
- Open your PDF file in FlexiPDF.
- Choose the ribbon command Insert | Stamp.
- Select the User-defined or Built-in.
- Click on any position on the page to set a standard-sized stamp or click and drag to create a stamp of any size.
Note: If, under File | Options, you have not yet entered a user name on the Saving tab, FlexiPDF now prompts you to do so. - Optional: After you have placed the stamp on the document, you can also add a comment / note to it. Double-click on the stamp and enter your comment text in the note window.
Alternatively: Right-click on the stamp to open the context menu and select Open Note. - To exit stamp mode, press Esc on the keyboard or select another tool in the Quick access toolbar.

FlexiPDF Professional 2022 Built-in stamps are: Approved, As is, Completed, Confidential, Departmental, Draft, Experimental, Final, For comment, FOr public release, Information only, Not approved, Not for public release, Preliminary results, Sold, Top secret, Void, Inital here, Sign here, Witness, Accepted and Refected.
Learn more and download FlexiPDF Professional here.

0 Comments